I'll bet you've been "thrifting" lately like the rest of the craft blogging world. And I'll bet you looked at the vintage pillowcases and even brought one or two home. If your daughter has all the pillowcase dresses she needs, why not make something for yourself? (yeah, I should totally have cleaned up the iron cord before I took the picture. By the way, those of you who guessed yellow would be the next ugly beach towel of choice just earned a gold star.)
The front of one pillowcase + Just barely over 1/2 yard of cotton + 30 minutes of your time = One very pretty hostess apron.
To start, cut the front off the pillowcase. A lot of these older pillowcases have gotten a bit warped over time so be sure that you are cutting the case square with the design edge. Also be sure you keep the design centered on the front. I cut mine 20 inches long, but you can make it as short or as long as you wish.
Now cut three strips of fabric out of a coordinating cotton. Two should be 7"x45" and one should be 7"x the width of the apron front as cut. If you want to keep this project to 1/2 yard of fabric, you can just cut your strips 6" wide. That will give you a 2 1/2" wide sash which should be plenty. I just like wide floppy bows on sashes so I wanted a full 3" sash.
Now sew the long pieces to either end of the short piece with a 1/2" seam. Press the seam open.
Finish the sides of the pillowcase with a narrow handkerchief hem. Basically, just fold the side 1/4" press it down and then fold it 1/4" again. The raw edge should now be hidden. Sew it down close to the folded edge.
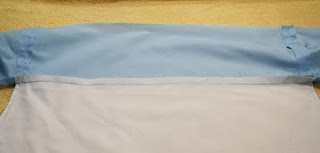
Now sew the top of the apron front to the sash. With right sides together, pin the apron front to the short section in the center of the sash. The edge of the apron front should match up with the seams in the sash. Sew it with a 1/2" seam. Press the seam up toward the sash.
Now fold the sash in half with the right sides together. Sew together with a 1/2" seam starting at the sash seam, down the sides and across the ends. Do not sew across the apron front. Trim the corners.
Turn the sash right side out and press. Turn the unsewn section of sash under half an inch and press. Pin down and sew closed. You can do stitch in a ditch, top stitch or hand sew. I was feeling lazy so mine is top stitched about 1/16" of an inch from the edge of the sash.
Super quick. Super easy. Super cute. Now you are ready to host a party.


No comments:
Post a Comment