Showing posts with label crafts for kids. Show all posts

Monday, December 5, 2011

Appliqued Towels

I have a friend who is afraid of her sewing machine.  Which works for me because she also owns a Cricut and vinyl.   I sewed a project she wanted for her kids and she's going to cut me a vinyl phrase.  I hope she knows what's she's getting into because my phrase is going to be about 30" long.  

I hope these towels are worth it for her:
I made two.   One for her girl and one for her boy.

I started with a print out of the CTR shield from lds.org.  I tried to find a link for you, but was unsuccessful.  I'm sure it's there somewhere.  This is super easy to do with any design, however.  You could do a monogram  for a child or newlyweds, too.  

I traced the image onto a piece of paper backed sewing adhesive.   You could probably print directly onto the paper, but my printer was acting up.  Just make sure you print your design mirrored.

 I just held the design up to the window (great big light box!) and traced it that way.  You'll notice all the letters are backward.  This is important.  

Next iron the design onto the back side of your fabric and cut the design out.
 Then fuse your design to towel one section at a time.  Play around with the design on towel to make sure you get the placement exactly where you want it.  It's impossible to change after this step.  

I saved my scraps with the paper backing still on when cutting out.   I ironed down the big shield shape first then I used the scraps to make sure I got the letters placed exactly where they belonged.  They did slip slightly though when I was iroring them down.  Working with towels is a bit difficult.

 Here's the design fully fused to the fabric.  It's ready to sew.
 You want to set your machine to an extremely tight zig zag.  Mine is down in the "buttonhole" size for length.  I'd give you exact numbers but my machine is not digital so I have no idea.  It's very close with no visible space between the zig zag stitches.  My stitch width is just barely smaller than 1/8th of an inch.  I kept it on the narrow side because of the narrowness of the design.
Sew around all the edges of the design.  You need to cover everything.  Notice how the foot and needle are placed.  You want the stitch to be almost entirely on the applique with less than 1/4 of it over the edge.  This will keep the applique from unraveling later as you wash it.  The nice thing about tight stitches like these is it's so easy to go slowly and take your time.  Don't hurry through this, you want to be sure your stitches are placed properly and your lines are straight.  When you sew the curves turn the fabric into the needle.  Curves can be tricky, so practice if you haven't sewn a lot of them.

And here it is all sewn down.  You can see my threads still because I'm tying them off instead of just cutting.
 I do this by threading a needle with the thread ends and pulling it down to the back side of the towel.  Then I tie a surgeon's knot and cut the ends as close as I can to the fabric.  This will help keep the thread from unraveling as the towel gets used.  Towels need to be sturdy and ready to put up with years of laundry and abuse (I don't know about your house, but towels get dropped on the floor and walked on a lot at mine.  Not that I like that happening.  We're working on it.  It's a lifetime project.)
 And you're done.  This is a great project for a niece or nephew for Christmas, too.  Do a Superman or Wonder Woman shield and you are the coolest aunt ever.   If you are doing several and use sale towels you should be able to keep the costs down to under $5 a towel.

Wednesday, February 16, 2011

Quick and Easy Baby Gift

Got a baby shower coming up?   How about whipping up a couple of onesie dresses.  They take less than half an hour each and they are as cheap as you can buy a onesie.  The skirt is scrap from other projects and the ribbon is from my I'm-really-going-to-use-it-someday ribbon collection.
 (Ok, so the photography on this one is horrible.  Sorry.  It's February and the light was just horrible that day.)

I started with an inexpensive 6-9 month sized onesie.   This one is pink and white stripes but the horrible photos mean you can't really see the stripes.  It really is a cute little outfit, I promise.

I laid the onesie down flat and measured across the center.  It's about 18 inches around.  
This measurement lets me figure how much fabric to cut for the skirt.  I decided to do a 1.5 times gather so I cut a piece of fabric 30"x8".   The fabric has a lot of body on it's own, so it looked ok.  Next time I'm going to do a full double gather at least (that would have meant cutting 37"x8" for the skirt.)  The fuller fabric would look really cute. 
I sewed up the side seam with a fake overlock stitch.  I don't have a serger or I would have used that.  This seam is going to show and get a lot of wear so make sure it looks nice and won't fray.  I'll be doing a French seam on the next one of these I sew. 
Do a narrow, folded hem (again, looks nice.  won't fray.)  I also sewed a coordinating ribbon about an inch from the hem.  It really added a lot. 
Gather and sew with a stretch stitch to the onsie.  You can see my seam here.  This doesn't have to be quite as pretty but do make sure you are using a stitch that will move with the baby and stretch to go over her head.
Press the skirt and wrap it up for baby.   These are also cute with a little applique on the front of the bodice.  You could do a heart or a crown.  Try a simple iron on design or a ribbon rose.

These little dresses are great summer wear for babies.  They can go out in a lightweight onesie but still be dressed up and cute.   If you've got a good pattern for them, you could make a pair of fabric booties to match as well.   Babies always have the cutest outfits.   Lucky babies.  I haven't gotten to wear a onesie since I was 19.   (If you remember we called them "body suits" and they were cool.   I also had the body to get away with shirts that tight at the time.  Lucky 19 year olds.)

Tuesday, January 18, 2011

Keeping Kids Entertained On a Rainy Day

We're all getting a bit stir crazy around here these days.  We don't live in the Great White North, just the North Enough To Be Cold and Snowy and Boring From December to March.   My kids have also had a four and a half day weekend. 

When things get desperate around here and sending them outside isn't an option, I fall back on my favorite craft site for kids:  The Toymaker.   Marilyn Scott-Waters designs 3-D paper craft printables for kids.   The projects are simple  to do with beautiful artwork.  She has paper dolls, race cars, mice that roll, and tiny puppet theaters, and little books to read.   My kids love her stuff. You can also check out her book on Amazon.com, The Toymaker's Christmas.  Her first book, The Toymaker, is not in stock new from Amazon but you may be able to find it somewhere else.

If you've got an older child you need to keep busy, you can also check out Canon Creative Park.  They have lots of more complicated projects and right now have quite a bit of Valentine's Day crafts. 

For simple 3-D paper crafts usually a glue stick is fine.  I do find that over time glue stick joints will break.  If you are doing a big project (like a castle) you may want to use white glue applied with a small paint brush.  It will hold forever.  Be sure to have good sharp scissors with a nice point for the detail cuts.  

Have fun and I hope you have full ink cartridges. ;)

Wednesday, January 5, 2011

I promised my girls quilts to go with their doll beds they got for Christmas and I got one of them done this weekend. 
As you can see, this one matches the quilt I made my daughter about three Christmases ago.   She loves that her little doll has a matching blanket.  

These are super easy to do and a great project if you're just getting into quilting.   It takes very little fabric and just a couple hours of time.    The finished quilt measures 18x24.  Each block is 2x2 inches and the sashing around the edge is 2 inches wide.  
To make it cut 70 blocks 2.5"x2.5"  and four sashing strips.  Two sashing strips measure 2.5"x18.5 and two measure 2.5"x24.5".   The quilt is 7 blocks across and 10 blocks down.  I did a mitered corner on the sashes and used a super simple binding technique.  I just put the right side of the front together with the right side of the back, laid the batting over it (my batting was a piece of flannel) and sewed around the edges with the standard 1/4" seam leaving 4" on one end open.  I then turned it right side out, pressed it and hand sewed it closed.   So far I've only quilted around the sashing seam.  With the size of the quilt and the fact that the batting is really fabric, I'm pretty sure that will be enough.

Now my girls are asking for pillows to match.  Good thing I have more fabric.

Friday, December 31, 2010

Collapsible Chessboard

 It's a bag.  You can put your chess pieces in it.
 Why would you want to put chess pieces in a bag like this?
Because it's really a chessboard.

We invented this because my oldest daughters thought her buddies at school needed a new chess board.  The one they were using is currently being held together with a bungee cord.    She thought they needed a board that would fit easily in a backpack and be portable for a bunch of teenage boys. 
It doesn't quite collapse quite as much as I had hoped, but it's still fun.   It opens back up again quite well and it's great for playing on potentially uneven surfaces.  Each square may not line up perfectly, but they will be more stable than a plain fabric board.   And it's cooler than a plain fabric board.  

To make your own you need 64 little blocks all exactly the same size.  We used half inch plywood cut 1.5"x1.5".   We found that thinner wood did collapse together better.  My husband set up a jig on his miter saw to make it go a little faster when cutting the blocks.   Next you need to stain half of them dark and half of them light.    Fit them together, and depending on how well you cut the blocks this may take some time to get them lined up well.   Then you get to flip it over (unless you are a much more graceful person than I, you may want to flip these over one piece at a time in order to avoid sending chessboard squares flying around your living room.  We did find the one that went under the couch eventually.)  Let it sit while you prepare the bag.

Cut a 24" circle out of heavyweight fabric, of course, if you do smaller blocks you may want a smaller bag.  Bigger blocks will need a bigger bag.   Find the exact center and make a grid identical to your blocks on the backside centered over the center of the board.   You might want to use a quilting marker that fades over time.   I also used my quilting ruler to draw the lines.  It made it very easy to draw perfectly parallel lines 1.5" away from each other.    Make a drawstring pocket around the edge.   I put in button holes to draw the cord through.

Now go back to your blocks.  They should all be upside down and pushed together tightly.   Put a drop of E6000 glue on the back of each and every block.    Gently set your fabric down over the blocks, lining up the grid with the edge of each block.   Make sure that's as perfect as you can make it, because it's your guide for the next step.   Now you need to put one 1/2" screw through the center of each and every grid square.  If you lined that up correctly you will have the screw in the center of each block. 

That's it.  A bit time consuming and fiddly when cutting and staining the blocks, but overall a pretty easy project.  It's also something that no one else will have, which should totally give you an extra pawn that acts like queen just because your board is cooler than theirs.

Wednesday, December 29, 2010

Gathered skirt with a deep yoke and skirt band

 My oldest daughter adores wild prints so I just could not pass this fabric up.  I knew it was exactly her.   We discussed it and decided that she would get this skirt for her Christmas dress.   She loves the skirt and it was super simple to make.

I will now confess to pulling apart patterns and only using the pieces I need for something.  If I have a sewing project in mind, why come up with an entirely new pattern when I have the parts already?  Why reinvent the wheel?  But also, I hate going the fabric store with a garment idea in my head and never finding the pattern I need to make what I'm planning to make.  So that's when I started mixing things up.

For this skirt I used a pencil skirt pattern I had on hand for the yoke and went patternless for the skirt.  Who needs a pattern for a gathered skirt anyway?  It's just one big rectangle.

To make this you will need one pencil skirt pattern that does not have a waistband, aprox. 1 1/4 yard main fabric (unless you are taller than about 5'4".  add fabric in that case based on how long you need your skirt to be),  1/2 yard accent fabric, enough trim to wrap around your hip with 4 or so inches left over, and a 9" zipper.   You will also need to use a good measuring tape and your quilt cutting tools.

To start, decide how long you want the skirt yoke to be. ( Our pattern is from the '90s and so goes all the way to the natural waist.  You may want a shorter or longer yoke.  And don't laugh at my pattern.  I know you've seen the Hollywood starlets in their natural waist pencil skirts lately.  It's totally cool again.) We finally decided that 6" of finished yoke would be perfect on my daughter.   Add 1 1/4 inches to that measurement.  Lay out the skirt front pattern and mark that measurement on the pattern.
  Fold the pattern up at the mark making sure you line up the inside edge of the pattern (that "place on fold" line)  to be sure you get a straight fold. 


Finished yoke length+1 1/4 inches=length of pattern piece

Pin the pattern piece down to the fabric leaving the rest of the skirt free from pins.  You do not have to cut apart your pattern.  Just cut around it so you can use it again.  Because I know you are dying to be like a Hollywood starlet and have a natural waist pencil skirt you can tuck your crisp, white oxford top into. 
 Now do the same measure, mark, and fold with the skirt back.   This time when you fold, line up the grain line arrow.  Pin the back in place.   Pin down your skirt facings.  Cut everything out.

Now lay out the rest of the fabric on your quilting mat.   Fold the folded edge to meet the selvage edge so you fabric is folded in fourths lengthwise.   Do this very carefully.  If this isn't straight or if the fabric has small folds in it along the length then your skirt will not be straight.

To figure the length of the skirt piece you need to cut, do this calculation:

Finished skirt length-finished yoke length-4 inches+1 1/8 inches=Skirt length

Basically, you need to subtract the yoke and the band lengths from your finished skirt measurement and then add back in your seam allowances.  (This will only be 1 1/8 inches instead of 1 1/4 because you're going to do a 1/2 seam to attach the band.)

Lay out the folded fabric on your quilting mat. Make sure it is lined up perfectly straight and then square the ends.  Cut two skirt lengths. No matter what size you wear your skirt will be two pieces the full width of the fabric.  On me, that would give me much less of a gather than it did on my daughter (over a triple gather.  Girl is skinny.)   If you are doing this for a little girl, you may be able to work with one width of fabric for the skirt rather than two.   All my measurements and fabric recommendations are for an adult size.
 Now use your cutting mat again to square the ends of the accent fabric and cut it in half so you have two pieces aprox. 9"x45".   
 Sew the yoke and facing exactly like the pattern recommends.  Do your darts and if you have a back seam sew that as well.  You need to leave the left side open for a zipper with this skirt.    Pin the yoke around the person you are sewing for or a dress form and be sure your yoke is straight.   Line up the waist and the yoke.  Trim as necessary to create a level edge around the bottom of the yoke.  This is also a good time to check your darts and seams to be sure it fits properly.
 Sew side seams on the band to create one long loop. Press open the seams. Fold the loop in half lengthwise so you have a 4 1/2" wide band. 
 Sew your skirt sides seams together and press.   Leave 3 inches unsewn at the top edge of the left side.  This is for your zipper.   Now sew the band to the bottom of the skirt using a 1/2" seam allowance. Make sure to match the seams.   Press the seam down toward the hem.   (Yes, there is a way to do this so it looks more finished from the inside.  I am somewhat lazy though and I don't think anyone is going to notice anyway.  If it will bother you, feel free to take the time to do it the other way.)
 Now sew your gathering stitches.  Divide the skirt into eighths and mark with pins by folding the skirt in half and then marking those ends with pins.  Fold again matching the pins in the center and marking the ends again.  Do this until you have divided the skirt into eighths.   Do the same for the yoke.  Match your seams and pins as you gather the skirt. 
 Sew the skirt to the yoke.  Press the seam. Carefully line up the trim along the seam line and sew down.
 Install your zipper according the package directions.   I will not be giving you zipper installation tips because I'm worthless at zippers.  They hate me.  Do not inspect my zipper in the next photo, please.  Thank you. 
Have fun sewing!

handmade projects

Friday, December 10, 2010

Farmhouse Doll beds and a mattress pattern


They're done! Aren't they so cute? I'm very happy with how they turned out. Ana White's doll bed instructions are really well done. Easy to follow and they build up quickly. Well once you've got the sanding done anyway. I didn't get full feeling back in my right arm for about three hours after sanding all this wood with a hand sander. It probably didn't help that I was using B grade lumber. It's cheap, just like me. And apparently, just like me, it's got some heavy duty rough spots.

I decided my girls needed mattresses for the beds so I sketched up a pattern for those.

Just a quick aside: if you want to make something and you aren't quite sure where to start, start with a sketch. Draw up what you want to make and put dimensions on it. It helps you picture the parts you need and know how big everything needs to be. It's also great for knowing how to put it together. I always start with a sketch.

Ok, so here's my sketch for the mattress:
I decided that I wanted to sew this out of one piece of fabric. I used the dimensions on the sketch to figure out how big of rectangle I needed to cut out of my fabric. However, my first mattress was a bit skimpy. Don't cut your fabric that size.

cut your fabric 33"x22". not the numbers in the sketch there. The larger piece will make a nicer fitting mattress for the bed.
Big rectangle. I use quilt cutting tools for projects like this. I get perfectly straight lines and square corners. So much easier. I almost never quilt but I use my cutting mat and rotary cutter all the time.

Next step is to fold the fabric in half so it creates a rectangle 16.5"x22". Sew a 1/2" seam all the way around, leaving a 4" gap on one side. I left the pins in the following photo so you could see the gap.
Trim your corners.
Now for the trick. The mattress stands about 1" tall. Match the seams together at the corners so the seam is directly in the center. Like this:
Then measure with a measuring tape 1/2" from the seam to the edge of the fabric on each side. This should create a straight line. (It's hard to explain, but the picture shows pretty clearly how to do that step.) Then draw a line along the measuring tape. This is a seam line.
Sew across that line. Now do this on all four corners.
Press the seams open and turn the mattress right side out. If you want the tufting to be perfectly even, measure and mark out six spots on the mattress to tuft. They should be evenly spaced across the mattress. Stuff it and sew the gap closed. I like to sew it closed by hand, but you can top stitch if you don't mind visible stitching on that section.

Next you get to tuft the mattress. I did a simple stitched tufting, but you can use a fabric covered button if you wish. On each mark, go down with a needle and thread all the way through the mattress. Pull through just enough thread to make a single 1/4" stitch (slip a button on if you wish) and send the needle back through the mattress. You should come up about 1/4" from where you went down. This will take a bit of maneuvering. Don't push the needle through until you've got that right.

Now, slip the needle between the threads right near the knot like this:
Pull it tight. The thread is now looped and will hold. The look of the mattress depends on how tightly you pull the tufting. You can leave it a little loose or pull the top and bottom fabric right up against each other. Tie off the thread and cut it close. Do this on the other five marks.


finished tufts. And you're done! How easy was that?

Wednesday, December 8, 2010

Monsters Again

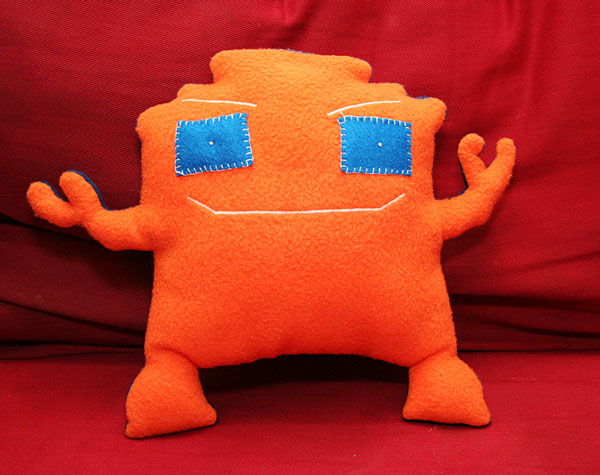
I'm still working on my my monsters projects. I've finished seven. Two got given away as gifts before I could get pictures of them sadly. These two are going to cousins on Christmas Eve.

The fin on the orange guy was sewn the same way I sewed the fins on the turquoise dude. After I stuffed the monster, making sure to lightly stuff the fin thing, I sewed the dividing line between the fin and the body. Then I sewed down toward the body several times to create the fin definition lines.

I think the green slug guy is my favorite monster yet. I'm pretty happy with the monsters my kids have drawn for me. They are pretty easy to work from.

Monday, November 15, 2010

More Monsters!


Aren't they cute? I've been having a lot of fun with this project and my kids are as well. They love seeing their monster drawings come to life. I've had to hide the monsters when I finish them because my kids just want to play with them. Not so great when these guys have to go to cousins as Christmas presents.

My oldest designed this one for her 13 year old cousin who's a Boise State fan:
Robot monster also has an evil side:
The blue isn't quite right, but I figure I can get fudge it just a bit.

This is Dizzery, designed by my 8 year old:
The spiral eyes were done using six strand embroidery floss. I tied a knot on the end and pulled the thread up through to the front. Then I carefully laid out the thread in a spiral, a bit at a time, and used a couching stitch to hold the thread in place. I pulled the embroidery thread back down and knotted it when I got to the end. This way there are no loose ends to come undone. It's perfect for toddlers and babies because there are no choking hazards on this monster face.

Another monster, PentaTenta, designed by the 10 year old:

I am in the middle of another monster right now. He's got some face work to finish up (my embroidery needle broke!) and then I can get him sewn together. My youngest is sad because hers is last. Silly girl, she doesn't know I still have 10 more to go after I finish that one!